Fitness: Spend 15 minutes working up to a moderate load on the complex of:
Halting Clean Deadlift + Clean + Jerk
Focus on having your weight over your mid foot at the mid-hang position. If you have a hard time organizing the pull off the floor, perform the clean from the mid-hang, after the clean halting deadlift.
Performance:
1) Clean and Jerk
1-1-1
2) High Hang Clean + Knee Hang Clean + Jerk
70% x (1+1+1) x 2
_________________
Front Squat
Fitness: 3 x 5 Linear Progression
Start at a weight that allows you to make jumps for the next 5 weeks.
Performance: 70% x 8 x 4
Rest two minutes between sets. Use 105% of the 1RM you used for last cycle.
Post loads to comments.
e1/6
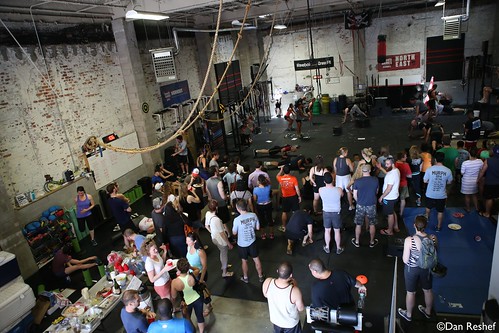
 Ladies who make front squatting look fun
- Happy belated birthday, Pablo!
First Veg and Egg CSA Pickup Today PLUS Eggs for Sale
Today is the first pickup of the season for the Sol Flower Farm vegetable CSA as well as the Herondale egg CSA. Here’s what you need to know:
- Bring your own bags to carry your goodies home
- Pickup is 6-8:30pm; anything unclaimed by 8:30pm is given away
- When you arrive, see Michele with the clipboard to check your name off the list
- Questions or issues? Email mignyc [at] gmail.com
Still want to sign up to receive eggs every week? You can! Download this form and return it to Herondale Farm.
Finally, have you been wondering how delicious a pastured, farm-raised egg could possibly be? It’s your lucky night! We will be offering eggs by the dozen for sale tonight to any member. They are $6.50, cash only. See Michele to purchase.
LAST CHANCE to join CFSBK’s Speed/Power Series
And while you’re at it, you can train for a super fun track meet, old school style.
Where: the epic Icahn Stadium on Randall’s Island
When: July 22, 2014
Michael O.’s Speed/Power Series crew is participating in a variety of events, from the 5000m, 1500m, 800m, and 4x400m relay. If you are interested in participating in any solo event or as part of a relay team, email michael.olzinski [at] gmail.com. To learn more about the event, click here.
QOD: What was your favorite outfit or article of clothing as a child?
_________________
11 Sneaky Ways to Move Every Day Breaking Muscle
The Roughest, Toughest Race in the World The Atlantic
The Workout: Becoming Rocky Balboa New York Times
Veteran FDNY Firefighter Is In Serious Need Of A Marrow Donor